Since I started Beauty Blogging for Bellydancers in January 2013, it seems only fitting that the last Friday of the year should be a retrospective of a few of my favorite products, ending with a couple that I haven't reviewed yet! Now, I'm not really good at ranking the things I love, so don't think of this as a "Top 10 Best Products" but more of a "the first ten things I thought of that I love and happen to have pictures of."
#1. Urban Decay Build-your-Own Palettes. While it's true that the colors in the palette I featured above had a "meh" pay-off, I really like the 6-pan build your own palette box they came in, and I also love my 4-pan with "Rock" in it. I also like that more and more companies are developing their own build-your own, because anything that makes it easier for me to take all my favorite colors in one easy package is OK with me.
#2. BLAST FLIPSTICK! It is possible that I included these just because I love the name, but honestly, I do get a ton of use out of the berry-hued one.
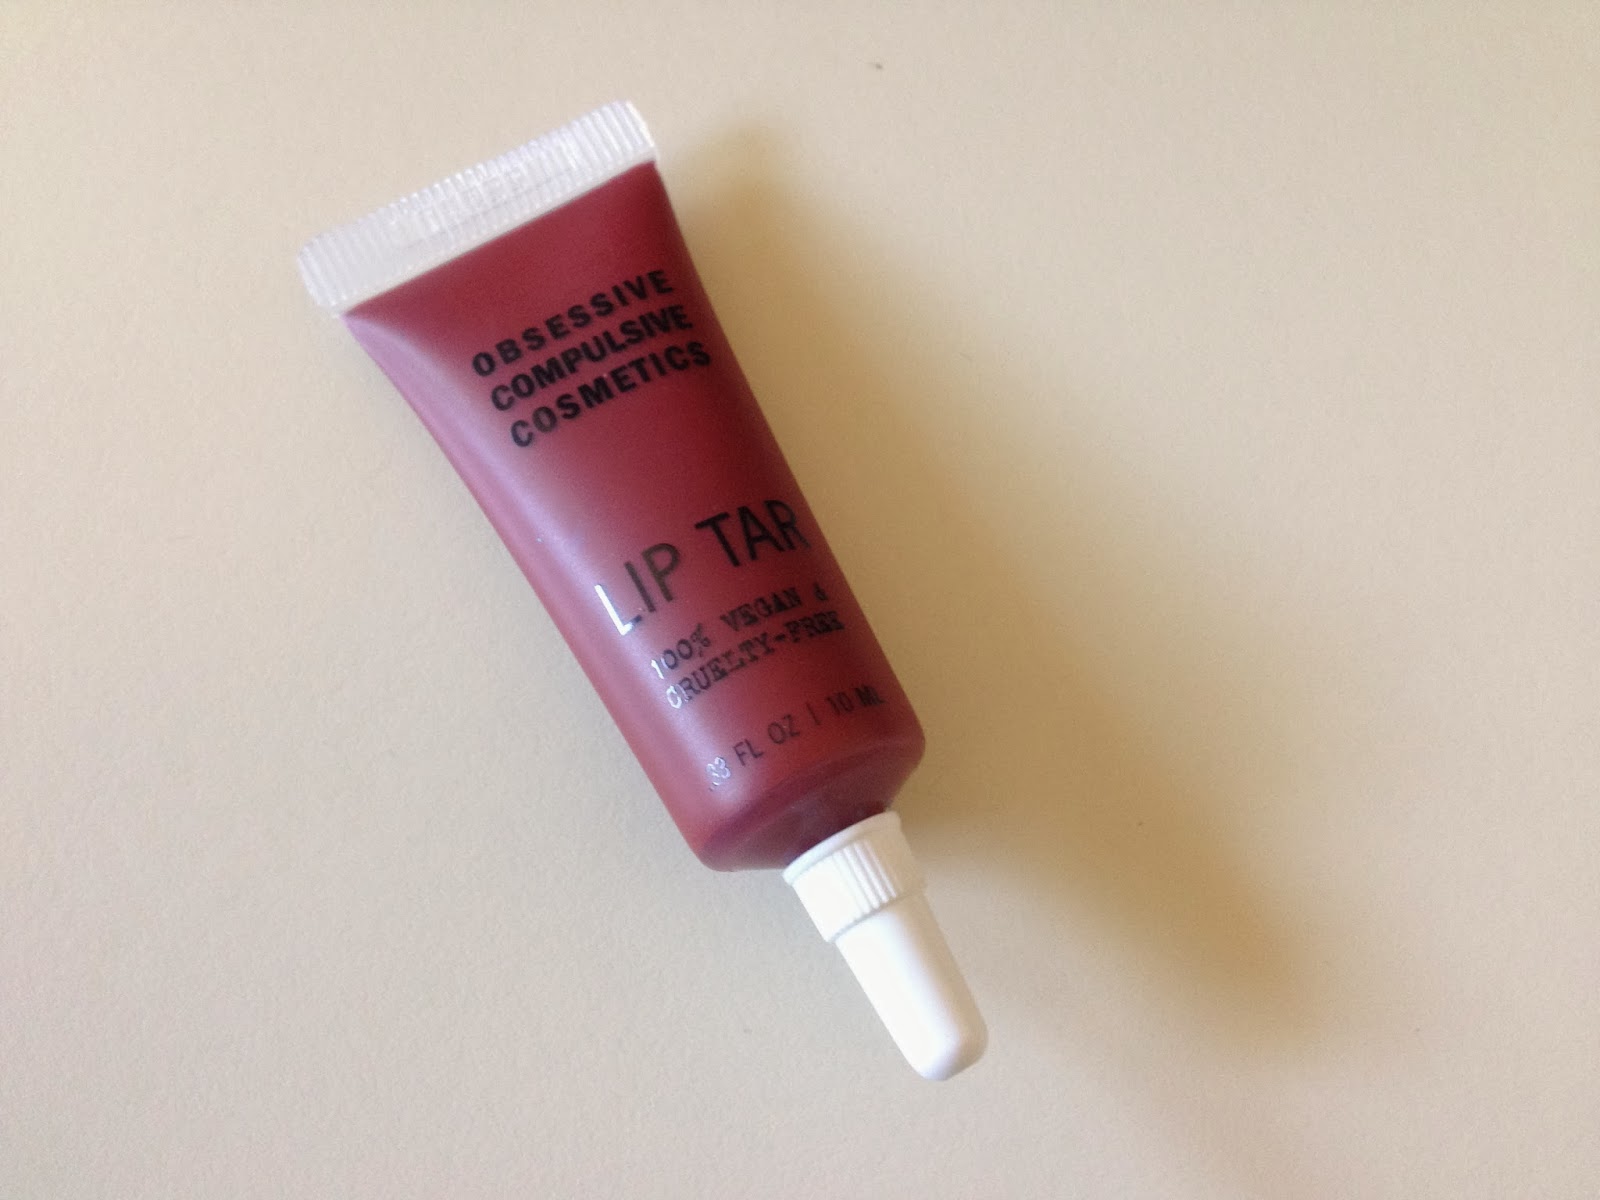
#3. Lip Tar by Obsessive Compulsive Cosmetics. I can't get enough of this stuff and I recommend it to everyone, I've even got my mom and my mother-in-law wearing it.
#4. Shiny, iridescent, color-shifting nail polish colors. This one is part of Maybelline's Color Show line but I like other brands, too.
#5. THE WONDER PENCIL! Another product where I love the name, but this unassuming, affordable product really does come in handy and I use it all the time.
#6. Spellbinding Eyeshadow Book. I haven't used this as much as I would like but I am really in love with the colors.
#7. Imperialis Facial Moisturizer by Lush Cosmetics. I LOVE this stuff. It makes my face smell like orange blossoms. It's a light, creamy moisturizer which keeps my skin from drying out in the desert air.
#8 and #9. Zoya brand nail polish and Jamberry nail wraps. I love Zoya for their unusual colors which tend to hold up well. Here I'm wearing Seraphina with a Black Friday exclusive Winter Morning nail wrap for a lovely, wintery nail look. Jamberry lets me have the fancy nail designs I'd never be able to master myself, without having to carve out time to go to the salon.
#10. e.l.f Lashes. They're affordable. They're available in a variety of styles. They're easy to buy at Target. And while I've been told the glue isn't great, it is latex-free. I honestly don't know why I've never reviewed these, as they're definitely perfect for bellydancers. I mean, at this price, you can even occasionally wear them for date-night or a party and not feel guilty.
Showing posts with label nail polish. Show all posts
Friday, December 27, 2013
Friday, December 20, 2013
Sally Hansen + Jamberry = LOVE
Today I'm performing at a holiday party, wearing a bright green skirt and a black bra/belt set. I wanted my nails to be festive but not Christmas-y, because I'm not a Christmas-y person, so I felt like green nails with black accents would be pretty slick. I combined Sally Hansen Insta-Dri in "In Record Lime" and a Jamberry wrap in Belle du Jour from my friend Kiss My Tips.
I love this combination! The Belle du Jour wrap adds a touch of elegance to my choice of almost obnoxious pea green. My nails are exciting without being too distracting, and the damask-like pattern will be the perfect compliment to the floral appliques on my bra and belt.
As for the nail polish, I am pretty impressed by the Insta-Dri line. Look at that brush! Why doesn't every nail polish have a brush with a rounded tip like that? It gets down perfectly into my cuticle without making a mess everywhere. Seriously, the smoothest application ever. In a $5 drug store nail polish! And I got that intense color from just one coat. Of course, I can't find "In Record Lime" on Sally Hansen's website so it must have been a limited edition, but there are plenty of other awesome colors to try, with or without a cool clear patterned Jamberry wrap layered over them (I vote for with).
I'm really excited about my nails right now and I can't wait to take them from gigs to socializing to dance class all weekend long.
I love this combination! The Belle du Jour wrap adds a touch of elegance to my choice of almost obnoxious pea green. My nails are exciting without being too distracting, and the damask-like pattern will be the perfect compliment to the floral appliques on my bra and belt.
As for the nail polish, I am pretty impressed by the Insta-Dri line. Look at that brush! Why doesn't every nail polish have a brush with a rounded tip like that? It gets down perfectly into my cuticle without making a mess everywhere. Seriously, the smoothest application ever. In a $5 drug store nail polish! And I got that intense color from just one coat. Of course, I can't find "In Record Lime" on Sally Hansen's website so it must have been a limited edition, but there are plenty of other awesome colors to try, with or without a cool clear patterned Jamberry wrap layered over them (I vote for with).
I'm really excited about my nails right now and I can't wait to take them from gigs to socializing to dance class all weekend long.
Friday, November 15, 2013
Formula X: Sephora's New Nail Line
A few months ago Sephora cleared out all of their Sephora by OPI brand nail polishes, which left me pretty curious about what they were going to replace them with. Well, the answer is here: Formula X for Sephora. The name makes me think of car racing or comic books (I read a lot of X-Men as a teen, OK?), but I guess it's pretty good for nail polish too.
Anyway, because I am such a good and dedicated beauty blogger, I broke my "no new nail polish" rule and picked up "The System" which is a set that includes a nail cleanser, a base coat/primer, your choice of nail color and a top coat. Breaking away from my normal trend of all green nail polish, all the time, I decided to nab "Cosmic" which is an awesome shiny purple (the website describes it as "plum pearl").
At first I was a little disappointed in this polish, because it started wearing away at the tips within a day. However, after that initial wearing I didn't get any chips until almost a week of wear. I feel like if I take a little more care with coating my tips next time, this polish could wear really well. Also, I got a nice, even application with just one coat, although it looked a little thin in sunlight so I might go with two coats next time.
This photo was taken after a week of wear! Not bad, not bad.
The base coat not only created a good surface to apply the polish to, but it also protected my nails from being stained by the dark polish, so that's a plus. I found this color pretty easy to remove.
A word about the packaging: I think that the rectangular bottles show the color pretty well, and mean they'll nestle together nicely when being stored. The squared caps have to be removed to open the bottle and seem superficial, unless they allow for stacking in storage. I will have to test this idea.
Although this polish is pretty good, I feel like $10.50 a bottle is a bit much, especially since a lot of the colors are well, pretty boring. They do have some amazing options in the Effects lines, but those are $12.50 a bottle. I have a feeling I'll slowly but surely invest in the Effects, but mainly use "The System" with other, more affordable nail polishes sandwiched between the good base and top coats.
Anyway, because I am such a good and dedicated beauty blogger, I broke my "no new nail polish" rule and picked up "The System" which is a set that includes a nail cleanser, a base coat/primer, your choice of nail color and a top coat. Breaking away from my normal trend of all green nail polish, all the time, I decided to nab "Cosmic" which is an awesome shiny purple (the website describes it as "plum pearl").
At first I was a little disappointed in this polish, because it started wearing away at the tips within a day. However, after that initial wearing I didn't get any chips until almost a week of wear. I feel like if I take a little more care with coating my tips next time, this polish could wear really well. Also, I got a nice, even application with just one coat, although it looked a little thin in sunlight so I might go with two coats next time.
The base coat not only created a good surface to apply the polish to, but it also protected my nails from being stained by the dark polish, so that's a plus. I found this color pretty easy to remove.
A word about the packaging: I think that the rectangular bottles show the color pretty well, and mean they'll nestle together nicely when being stored. The squared caps have to be removed to open the bottle and seem superficial, unless they allow for stacking in storage. I will have to test this idea.
Although this polish is pretty good, I feel like $10.50 a bottle is a bit much, especially since a lot of the colors are well, pretty boring. They do have some amazing options in the Effects lines, but those are $12.50 a bottle. I have a feeling I'll slowly but surely invest in the Effects, but mainly use "The System" with other, more affordable nail polishes sandwiched between the good base and top coats.
Friday, October 11, 2013
Jamberry Nail Wraps
Recently a friend of mine started her own Jamberry nail wrap business, Kiss My Tips, and when she offered to send out some samples, I jumped at the chance to try a new nail product and review it here on my blog.
In case you're not familiar with nail wraps, they're sort of like stickers for your nails. You can use them for an entire manicure, or pick a cute patterned one to use as an accent nail, as I did for my space-themed nail look here. For new, skeptical customers they suggest that you pit Jamberry against traditional nail polish for one week, by wearing your favorite color and some wraps for one week and seeing which looks better at the end of the challenge. Well, instead of using a favorite color I picked a random color from my stash that looked good with the galaxy-patterned wraps. This proved to be a mistake as the nail polish was old and from a random brand and didn't go on well and didn't last long even with a base and top coat. I was ready to remove my manicure after only about 4-5 days but I stuck it out for the full seven and this was the result:
The wrap on my left nail is in perfect shape! The one on my right looks pretty good but it was peeling away/fraying at the tip. I think when I applied them I didn't seal that edge well enough because it started peeling at the corner almost immediately, whereas the left one pretty much stayed in place.
Application and removal were pretty easy. You apply them with a bit of heat and pressure -- I used my space heater and it worked perfectly. I feel like it would take a little practice to line them up perfectly, because they went on a little crooked so I had blank space on one side, but you could only tell if you were really examining my nails. To remove, just heat them back up again and peel. They left some sticky residue on my nails, but I slathered on some cuticle cream and the oils broke up the adhesive. Easy-peasy.
I have really long nails, as you see, and by cutting a strip in half I was able to do two nails and have excess on the ends. During the week that I wore them, I did all the sorts of things that would abuse a manicure... Lots of handwashing and showers, including using using some body scrub, plenty of crafting, playing with pets, dance classes and performances, I even had to replace a split ring on my keys which did a number on my traditional nail polish. If they can hold up to my lifestyle, they're pretty sturdy. I'd definitely recommend them for my fellow dancers who lead a busy life and want to still have fabulous nails for class and gigs.
Although I still like traditional nail polish and enjoy taking the time to give myself a manicure, since Jamberry wraps come in a lot of fancy designs (patterns, ombre fades, even sports team logos), they're ideal for when you want one of those cool nail art manicures without stressing about how quickly it's going to chip! I've also heard that they come in glitter colors which don't leave sparkles all over your nails after removal, so I'm pretty intrigued by that. Oh yes, and you can of course use them on your toes, too.
FTC disclaimer: These wraps were provided for free for testing purposes. I chose to blog them of my own volition.
In case you're not familiar with nail wraps, they're sort of like stickers for your nails. You can use them for an entire manicure, or pick a cute patterned one to use as an accent nail, as I did for my space-themed nail look here. For new, skeptical customers they suggest that you pit Jamberry against traditional nail polish for one week, by wearing your favorite color and some wraps for one week and seeing which looks better at the end of the challenge. Well, instead of using a favorite color I picked a random color from my stash that looked good with the galaxy-patterned wraps. This proved to be a mistake as the nail polish was old and from a random brand and didn't go on well and didn't last long even with a base and top coat. I was ready to remove my manicure after only about 4-5 days but I stuck it out for the full seven and this was the result:
The wrap on my left nail is in perfect shape! The one on my right looks pretty good but it was peeling away/fraying at the tip. I think when I applied them I didn't seal that edge well enough because it started peeling at the corner almost immediately, whereas the left one pretty much stayed in place.
Application and removal were pretty easy. You apply them with a bit of heat and pressure -- I used my space heater and it worked perfectly. I feel like it would take a little practice to line them up perfectly, because they went on a little crooked so I had blank space on one side, but you could only tell if you were really examining my nails. To remove, just heat them back up again and peel. They left some sticky residue on my nails, but I slathered on some cuticle cream and the oils broke up the adhesive. Easy-peasy.
I have really long nails, as you see, and by cutting a strip in half I was able to do two nails and have excess on the ends. During the week that I wore them, I did all the sorts of things that would abuse a manicure... Lots of handwashing and showers, including using using some body scrub, plenty of crafting, playing with pets, dance classes and performances, I even had to replace a split ring on my keys which did a number on my traditional nail polish. If they can hold up to my lifestyle, they're pretty sturdy. I'd definitely recommend them for my fellow dancers who lead a busy life and want to still have fabulous nails for class and gigs.
Although I still like traditional nail polish and enjoy taking the time to give myself a manicure, since Jamberry wraps come in a lot of fancy designs (patterns, ombre fades, even sports team logos), they're ideal for when you want one of those cool nail art manicures without stressing about how quickly it's going to chip! I've also heard that they come in glitter colors which don't leave sparkles all over your nails after removal, so I'm pretty intrigued by that. Oh yes, and you can of course use them on your toes, too.
FTC disclaimer: These wraps were provided for free for testing purposes. I chose to blog them of my own volition.
Friday, August 16, 2013
Did I strike gold with Maybelline?
It's funny, because I'm reviewing gold eye shadow. WOW is that really gold.
Following up on last week's affordable e.l.f. palette, I thought I'd review another drugstore line that I'd heard pretty good things about... Maybelline's Color Tattoo eye shadows. I picked up two different styles... the new Pure Pigments in Forest Fatale (it's as if they marketed it directly at me!), and the 24 Hour Metal in Gold Rush.
Besides sounding like a music festival, Color Tattoo 24 Hour Metal is a gel shadow. I was hoping that Gold Rush would go on thick and give me an insane pop of gold, but instead it was like crackled gold leaf. It's very pretty, and I think it would be great for an Ancient Egypt-themed look, paired with cobalt and black eyeliner. It's also nice for a magical faerie look. But it doesn't necessarily have enough impact for the big stage -- you'd be better off with gold glitter. Save this one for the restaurants and other small stages.
Pure Pigments are your typical loose pigments. It went on nicely and stayed on well but when I did find a ton of fall-out on my counter from when I was applying it! I applied it dry with a nice fluffy brush. It would probably be more intense if applied wet. This is another one that is definitely more suited for when you're going to be up close with your audience.
As always, I applied these colors over UD's Primer Potion and then used a couple spritzes of setting spray to keep it in place through two hours of dance class. Surprisingly, even though it was a hot muggy night and we worked really hard, I didn't have any color loss. I thought about leaving it on overnight to see if 24 Hour Metal lived up to its name, but I didn't want to chance getting mascara smudges on my pillowcase.
Bonus nail polish review! Maybelline's Color Show line of nail polish seems to have a few trendy options. Mystic Green is part of the holographic collection and is one of those awesome color-shift iridescent colors. It shifts through gold, green and blue and is GORGEOUS! This is two coats with a base and top coat. I've been wearing it for a couple of days and it's held up well -- except for the weird marks where I fell asleep on top of my hand. It turns out that those drying drops will still leave your polish soft for at least an hour or so. Whoops. Anyway, I think these holographic colors are great for performances, and they have a pinky-purply one for those of you who don't wear green costumes every time you perform. And at around $3/bottle it's a lot more affordable than similar colors from other brands.
Not getting enough cosmetics reviews? Go like my fan page on Facebook. I've started posting bonus mini-reviews throughout the week as I try things that don't quite fit in the blog.
Following up on last week's affordable e.l.f. palette, I thought I'd review another drugstore line that I'd heard pretty good things about... Maybelline's Color Tattoo eye shadows. I picked up two different styles... the new Pure Pigments in Forest Fatale (it's as if they marketed it directly at me!), and the 24 Hour Metal in Gold Rush.
Besides sounding like a music festival, Color Tattoo 24 Hour Metal is a gel shadow. I was hoping that Gold Rush would go on thick and give me an insane pop of gold, but instead it was like crackled gold leaf. It's very pretty, and I think it would be great for an Ancient Egypt-themed look, paired with cobalt and black eyeliner. It's also nice for a magical faerie look. But it doesn't necessarily have enough impact for the big stage -- you'd be better off with gold glitter. Save this one for the restaurants and other small stages.
Pure Pigments are your typical loose pigments. It went on nicely and stayed on well but when I did find a ton of fall-out on my counter from when I was applying it! I applied it dry with a nice fluffy brush. It would probably be more intense if applied wet. This is another one that is definitely more suited for when you're going to be up close with your audience.
As always, I applied these colors over UD's Primer Potion and then used a couple spritzes of setting spray to keep it in place through two hours of dance class. Surprisingly, even though it was a hot muggy night and we worked really hard, I didn't have any color loss. I thought about leaving it on overnight to see if 24 Hour Metal lived up to its name, but I didn't want to chance getting mascara smudges on my pillowcase.
Bonus nail polish review! Maybelline's Color Show line of nail polish seems to have a few trendy options. Mystic Green is part of the holographic collection and is one of those awesome color-shift iridescent colors. It shifts through gold, green and blue and is GORGEOUS! This is two coats with a base and top coat. I've been wearing it for a couple of days and it's held up well -- except for the weird marks where I fell asleep on top of my hand. It turns out that those drying drops will still leave your polish soft for at least an hour or so. Whoops. Anyway, I think these holographic colors are great for performances, and they have a pinky-purply one for those of you who don't wear green costumes every time you perform. And at around $3/bottle it's a lot more affordable than similar colors from other brands.
Not getting enough cosmetics reviews? Go like my fan page on Facebook. I've started posting bonus mini-reviews throughout the week as I try things that don't quite fit in the blog.
Friday, August 2, 2013
Sephora Impulse Buys
Have I admitted yet that I come from a family that self-medicates through retail therapy? For at least three generations of my Mom's side, when we're feeling down we shop. But it doesn't just have to be sadness, sometimes it's 100 degrees out and your house is not sufficiently cool and you're bored of sweating at the computer, so you drag your husband off to the mall to enjoy some air conditioning and window shopping. Then you're like "Well let's go to Sephora because I want to see if they have the new UD lipstick" and then when they don't, you just wander around because you want to buy something. Let's pretend that I only bought these two somethings and that there's not also a little bag full of nail polish minis (in my defense, they were only a dollar each).
Did you know that Sephora is clearing out their entire Sephora by OPI line of nail polish? I'm curious to see what they replace it with. I really wanted to buy about a zillion colors, but I settled for "Is She For Reel?" which my husband pointed out. See, there was a reason to drag him along, his eye is caught by different things than mine. I go for the same greens that I already have three variations of, and he notices the super-sparkly silver with iridescent micro-glitter. It's hard to describe this color, it's kind of like... magical pyrite. Does that make sense? How about... silver titanium coated drusy? Maybe? Well anyway, I totally recommend going to your local Sephora to see if it's still in-stock, or ordering on-line, because this color is sweet. You know those weekends when you have multiple gigs and each one has a totally different colored costume? Well, this is the super-sparkly neutral that will go with all of them. I'm wearing two coats and it actually looks more opaque in person than it does in the picture.
Now, what is this interesting little bottle and why is it purple instead of green? Have I been replaced by an alien pod person? Would I tell you if I was? Stop worrying about that and go check out Light Storm Liquid Shadow. It's shiny! This is the Smoked Grape color which isn't on the website, oddly enough.
LOOK AT HOW SHINY IT IS! It has this amazing shimmery color-shift effect. You can see why I had to buy it even though it doesn't come in green. Of the three colors available, Chris and I felt that Smoked Grape had the best shine and color shift (yes, my man is confident enough in his masculinity to offer an opinion on purple eyeshadow).
Thankfully we were wearing our all-black costumes for Open Stage last night, so I had the perfect opportunity to get purple on my eyes. I think this color wears really well on my skin tone. I did a smokey eye with my favorite almost-black MAC eyeshadow, a cool purple I found in one of my UD palettes, and then some NYX glitter to keep it from looking too bruise-y. Add some black gel liner and some black mascara, plus a little maroon liner under the eye (not visible here due to lashes) and I'm good to go! Style note: Sometimes if you wear purple eyeshadow and red lipstick, it either clashes weirdly or looks too Red Hat Lady-ish, so I forewent my usual red and instead applied the light metallic plummy color from one of my Blast Flipsticks (hahahaha) and dabbed it with a bit of the same glitter as my eyes to tie it together. I think it was a good choice.
Oh yeah. I guess I should actually review the product and talk about application! It comes with a fuzzy wand applicator like some lip glosses. I put it on my lid with that and then blended it out with my eye. Of course I applied it over my trusty UD Primer Potion and then used a little UD makeup setting spray to hold everything in place. I am happy to say that at the end of the night, after several hours of wear, a lot of dancing and some sweating, it still looked great! It had not collected in my crease at all, and the color had not faded.
I am giving this a strong recommendation for my fellow dancers! It looks great, it's easy to apply, and it wears well! Those of you who wear a lot of purple or pink will really love this specific color. I think I'm going to go pick up the Caramel Cream as well because while it has less color-shift it's still pretty shiny and would go well with a couple of costumes I've got in the works. Also, if you love green like I do, please join me in lobbying Sephora to make this product available in either a green-gold shift or a green-blue shift inspired by jewel beetle elytra. That would make my life complete!
Did you know that Sephora is clearing out their entire Sephora by OPI line of nail polish? I'm curious to see what they replace it with. I really wanted to buy about a zillion colors, but I settled for "Is She For Reel?" which my husband pointed out. See, there was a reason to drag him along, his eye is caught by different things than mine. I go for the same greens that I already have three variations of, and he notices the super-sparkly silver with iridescent micro-glitter. It's hard to describe this color, it's kind of like... magical pyrite. Does that make sense? How about... silver titanium coated drusy? Maybe? Well anyway, I totally recommend going to your local Sephora to see if it's still in-stock, or ordering on-line, because this color is sweet. You know those weekends when you have multiple gigs and each one has a totally different colored costume? Well, this is the super-sparkly neutral that will go with all of them. I'm wearing two coats and it actually looks more opaque in person than it does in the picture.
Now, what is this interesting little bottle and why is it purple instead of green? Have I been replaced by an alien pod person? Would I tell you if I was? Stop worrying about that and go check out Light Storm Liquid Shadow. It's shiny! This is the Smoked Grape color which isn't on the website, oddly enough.
LOOK AT HOW SHINY IT IS! It has this amazing shimmery color-shift effect. You can see why I had to buy it even though it doesn't come in green. Of the three colors available, Chris and I felt that Smoked Grape had the best shine and color shift (yes, my man is confident enough in his masculinity to offer an opinion on purple eyeshadow).
Thankfully we were wearing our all-black costumes for Open Stage last night, so I had the perfect opportunity to get purple on my eyes. I think this color wears really well on my skin tone. I did a smokey eye with my favorite almost-black MAC eyeshadow, a cool purple I found in one of my UD palettes, and then some NYX glitter to keep it from looking too bruise-y. Add some black gel liner and some black mascara, plus a little maroon liner under the eye (not visible here due to lashes) and I'm good to go! Style note: Sometimes if you wear purple eyeshadow and red lipstick, it either clashes weirdly or looks too Red Hat Lady-ish, so I forewent my usual red and instead applied the light metallic plummy color from one of my Blast Flipsticks (hahahaha) and dabbed it with a bit of the same glitter as my eyes to tie it together. I think it was a good choice.
Oh yeah. I guess I should actually review the product and talk about application! It comes with a fuzzy wand applicator like some lip glosses. I put it on my lid with that and then blended it out with my eye. Of course I applied it over my trusty UD Primer Potion and then used a little UD makeup setting spray to hold everything in place. I am happy to say that at the end of the night, after several hours of wear, a lot of dancing and some sweating, it still looked great! It had not collected in my crease at all, and the color had not faded.
I am giving this a strong recommendation for my fellow dancers! It looks great, it's easy to apply, and it wears well! Those of you who wear a lot of purple or pink will really love this specific color. I think I'm going to go pick up the Caramel Cream as well because while it has less color-shift it's still pretty shiny and would go well with a couple of costumes I've got in the works. Also, if you love green like I do, please join me in lobbying Sephora to make this product available in either a green-gold shift or a green-blue shift inspired by jewel beetle elytra. That would make my life complete!
Friday, July 26, 2013
I bought nail polish on Etsy!
Somehow, although I love nail polish and I love shopping on Etsy, I hadn't yet combined those two things. I guess it was because there was so much nail polish that I could buy in the store, without paying shipping, so I went for instant gratification. I bookmarked a few shops but hadn't gotten around to ordering any yet... until Literary Lacquers released their Anne of Green Gables line, and I saw that it included a yummy emerald green holographic glitter, which was exactly what I needed in my life.
I really love the concept behind Literary Lacquers, which is nail polish inspired by favorite books. Oddly enough, I've never actually read any of the books that inspire her collections, but I'm sure eventually she'll have to have a Lord of the Rings or American Gods collection, right?
I bought Green Gables and I took the time last night to give myself a really good manicure. I buffed my nails, did a base coat, let it dry between every coat, and finished it with a top coat. The result is a really smooth, really shiny and sparkly nail.
So far I'm really impressed with the quality. The color went on smoothly and so far has held up to numerous hand-washings and chores and even bathing all of my makeup brushes and my manicure still looks pristine. The color is a little sheer, it took three coats for me to get a mostly-opaque application, but it looked good at two coats too, just not as intense as I wanted.
But is it good for bellydancers? Oh yes. It would be perfect to match a sparkly cab costume made with holographic fabric or adorned with holographic sequins (check her shop for other shades of holographic glitter if you're not a green girl like me). For those of us who are more tribal-inclined, it obviously won't go with darker costumes or a more traditional ATS-inspired costume, but it would be great with a bright green costume and especially fun if you're performing at a faerie festival or other fantasy event. I just held it up against my green Flip'N Tribal belt and it looks great with the green-dyed lace.
My apologies for the poorly-lit picture, by the way. I was going to go take a nice one out in the sunshine so you could fully appreciate the holographic glitter effect, but then a monsoon blew in. Such is life in Tucson!
I really love the concept behind Literary Lacquers, which is nail polish inspired by favorite books. Oddly enough, I've never actually read any of the books that inspire her collections, but I'm sure eventually she'll have to have a Lord of the Rings or American Gods collection, right?
I bought Green Gables and I took the time last night to give myself a really good manicure. I buffed my nails, did a base coat, let it dry between every coat, and finished it with a top coat. The result is a really smooth, really shiny and sparkly nail.
So far I'm really impressed with the quality. The color went on smoothly and so far has held up to numerous hand-washings and chores and even bathing all of my makeup brushes and my manicure still looks pristine. The color is a little sheer, it took three coats for me to get a mostly-opaque application, but it looked good at two coats too, just not as intense as I wanted.
But is it good for bellydancers? Oh yes. It would be perfect to match a sparkly cab costume made with holographic fabric or adorned with holographic sequins (check her shop for other shades of holographic glitter if you're not a green girl like me). For those of us who are more tribal-inclined, it obviously won't go with darker costumes or a more traditional ATS-inspired costume, but it would be great with a bright green costume and especially fun if you're performing at a faerie festival or other fantasy event. I just held it up against my green Flip'N Tribal belt and it looks great with the green-dyed lace.
My apologies for the poorly-lit picture, by the way. I was going to go take a nice one out in the sunshine so you could fully appreciate the holographic glitter effect, but then a monsoon blew in. Such is life in Tucson!
Friday, June 21, 2013
Textured Nail Polish: Not For Me
That's right, Beauty Blogging for Belly Dancers is finally back, and we're looking at the current trend of textured nail polish! Now, in general I am digging the fact that nail polish has exploded from "colors or French manicures" to this art form that encompasses tiny drawings, crystals, decals, micro glitter, chunky glitter, shaped glitter, holographic glitter (we've already established that I love glitter, right?), matte colors, iridescence, and so much more. But I haven't really been excited by the idea of textured nails. As much as I love glitter, I hate the rough texture that chunky glitter has and how annoying it is to remove from nails.
However, I figured I couldn't accurately judge these polishes without putting them on my nails and wearing them for a few days, and besides... FUZZY COAT? What is up with that. Will it give me weird Muppet nails?
I'm just going to say that I do not like the Sugar Coat at all, which is a shame because it's a nice color. The directions on the bottle say to apply two thin coats, but it was difficult to get it to go on thinly or smoothly, and the second coat was especially messy because the chunks from the first coat collected the chunks from the second coat. This lead to spots that didn't really get painted at all because they were blocked by a tiny hill of "sugar." You can see how rough the edges are around my cuticles. And this is why I didn't use a topcoat, because the nail surface was so rough that I knew I wouldn't get a smooth application.
As for the Fuzzy Coat, it's not fuzzy, so what's the point? The inclusions might be some sort of fuzz, but once they're trapped in clear nail polish, they function as a non-sparkly glitter, and who wants glitter that doesn't sparkle? That said, it did go on really easily, and two coats gave me a decent amount of "fuzz", so if you like the look, then it's not a bad product.
I painted my nails on Monday and forced myself to endure the weird, rough texture of Sugar Coat until Thursday night. It's kind of like having sandpaper on your fingers. Not quite as abrasive, but it sort of catches on things and feels nasty. It's like the nail polish equivalent of that cottage cheese stuff they spray on the ceiling of apartments. When the time came to remove it, it was difficult because of course the cotton balls snagged on the "sugar", the "fuzz" showed a glitter-like tenacity, and I ended up with blue stains in my cuticles (so if you do like Sugar Coat and you buy this color, be sure to use one of those base coats that prevents staining). I also noticed a bit of peeling on a couple of my nails, which is not normal for me.
From the dancer's point of view, I don't see much use for either of these textures. They don't lend an air of glamor. I guess the Sugar Coat could give you a kind of sandy mermaidy look, but I also think it would feel awful against silk veils and any sort of lightweight flowy costuming material. It probably wouldn't actually snag, but you'd constantly feel like it was. Besides which, if you're close enough to your audience that they can see the texture, you'll also be close enough that they can see all the weird gaps around the edges where you couldn't get it to go on smoothly. Lastly, who knows how long this texture trend will last, it might already be passe by the end of the year and then you'll have this weird nail polish that you never want to wear again. Save your money and go buy something glittery instead.
Friday, March 15, 2013
The Epic Emerald Review
Are you ready for this? Are you ready for the fruits of a Sephora shopping spree and two days of makeup testing? Because here it is... My review of a significant chunk of the items in the Sephora + Pantone Universe Color of the Year Emerald Collection. The only item in that pic that didn't make it into the review is the green glitter eyelashes because I am saving them for a special occasion.
First let's look at some of the items from the big Color of the Year box set. You can buy all of these individually, but if you want most of the items it's probably worth buying the whole box.
Here's the color grid block in Bionic. I love how it's packaged! Those are little magnets in each corner, so you can have it all stacked up, or flip the lid and mirror out. Clever! There are two other color grids available and this was actually the least-interesting one to me, but it came in the box and I wanted everything else in the box, so there you have it.
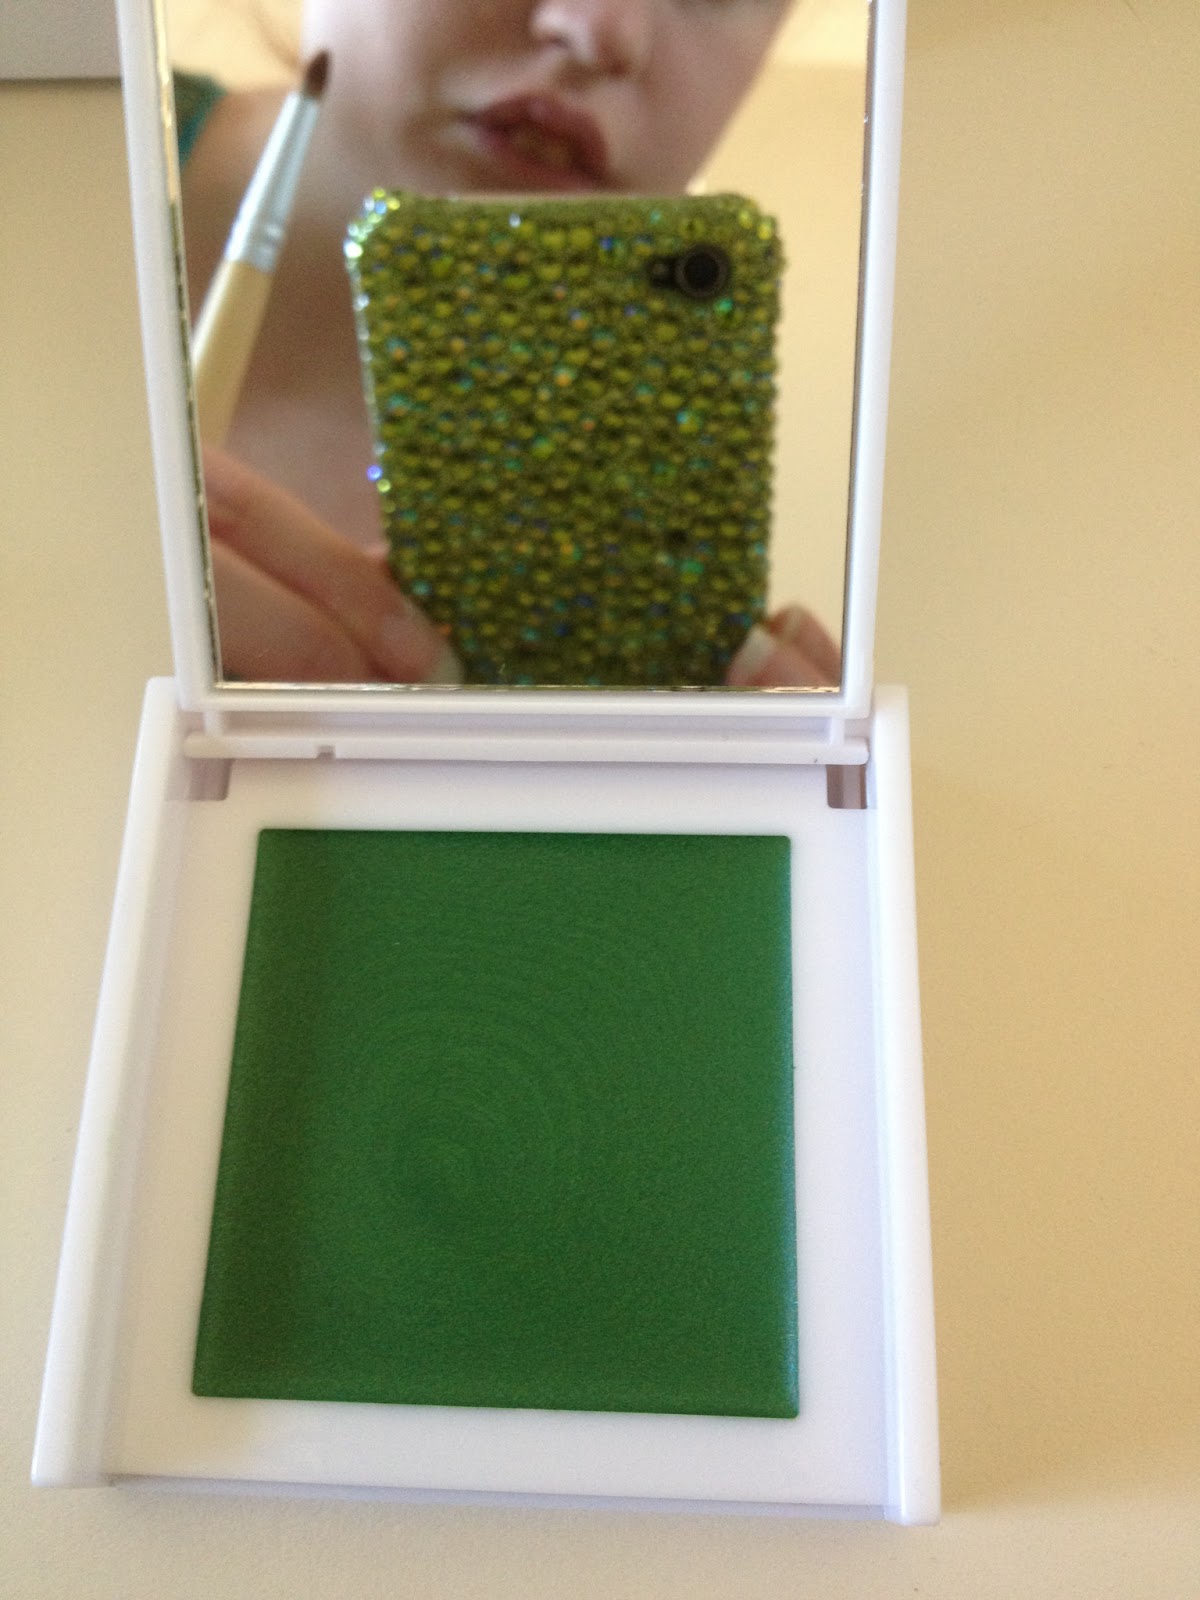
And this is Color Code Prismatic Shadow Block, with a bonus mirror picture of me and my sparkly phone. I actually didn't use this on my first day of testing for reasons that will become obvious when we get down to the swatch.
Here's the Graphic Sculpt Waterproof Jumbo Liner, a big fat liner pencil. This is one of the few items I wasn't going to buy separately, because I wasn't sure what I'd do with it.
Lightspeed Glitter Dust. Aw yeah! This is one of the things I was most excited about. Green. Glitter. Microglitter! Shown here with Medusa's Makeup glitter base, which I will totally review another day because it is also awesome.
Color Cube Lid Stain. I don't know what "lid stain" means but as far as I can tell it's a gel liner, and I love gel liner and I love this color. I guess you can also use it as a shadow, so this will require future experimentation.
Hand swatch, hand swatch! I swear I rotated this picture, but Blogger rotated it back, so whatever. We'll go top to bottom instead of left to right.
As you can see, the silver color in the Bionic block is almost invisible on my hand (but it's actually pretty nice in real life, a shimmery white/silver that really brightened the corners of my eyes), the blue is really "meh" and the emerald green is a spot-on match for the Pantone color.
Then there's the Prismatic shadow block. Ok, this is NOT emerald. It's a nice color, and I like it, but it has way too much of a yellow tone compared to the very blue emeralds in this collection. I had to save it for Day 2.
Graphic Sculpt liner looks pretty good! It's like coloring with a crayon. I decided it would probably be good for under-eye, so that's how I ended up using it, as you'll see soon.
Lid Stain. Oh wow, look at that yummy metallic green. This is one of my new favorite things.
Lightspeed Glitter. Kind of like a mineral eye shadow. Will require future experimentation. Lots of experimentation.
And here's the look I made with those items (minus that not-emerald eye shadow). Looks pretty good with my eyes open! I threw on a little black mascara to complete the look.
Eyes closed, you can really see how weak that blue is. Yuck! This was applied over my usual Urban Decay primer, which was just not enough to make that color stick. But also look at that lid stain liner. So pretty!
And how did it hold up? Well, I wore it for about 6 hours, which included going to dinner and then two hours of dance class. By the time I got home, my emerald and blue eyeshadows had become one and I had naked patches on my eyes. Not pleased. Not pleased at all. I have received a lot of advice on Facebook on how to possibly get the colors to be more intense and last longer, but you know what? That Bionic block retails for $26. At that price, I expect it to be comparable with my Urban Decay and MAC shadows, not some department store cheapy.
Hey! Let's take a break and talk nails! I bought the three pack of Mini Graphic Effect Lacquers. There's a shimmer, which is pretty nice and simple and looks great. There's a glitter, which is more of a shamrock than emerald green and has a slight green tint to the base. I want to try it over other colors for sure. And then there's what they labeled as a metallic, which is more like a semi-matte opaque with lots of glitter. I like how that one looks but it feels kind of chunky. I applied them over a base coat, but since I was in a hurry I didn't use a top coat and I used the quick-dry drops. My left hand (with all three colors) is holding up fine, but my right hand (with just the "metallic") is already chipping a lot.
Please take a moment to admire the awkwardness of this picture where I tried to show all three bottles and all three colors on my nails.
Heyo! Back to the big box! Here is the Graphic Lift Liquid Eyeliner. It is a pretty metallic emerald green but you won't be able to tell until you get down to the swatches because this is a bad picture.
Oh, you like eyeliners, you say? Well how about we also take a look at the Glitter Strobe Eyeliner Set, which contains four different mini-tubes of emerald liquid liner with different effects, similar to the nail polish. I am super-excited about this!
By the way, this release is heavy on the eyeliner. Look, I bought 7 liners and there's still one more I didn't get. And that's not counting the liner pencils that were already available in emeraldish colors. So basically what I am saying is that if you want emerald green eyeliner, they have you covered and then some.
Hey look, swatches! Yep, all those liners are different. There's a nice plain opaque and a few different metallics and glitters, for whatever sort of look you want to do. I also swatched that eyeshadow again so you can see how it doesn't really go with any of these but I'm using it for this look anyway.
Lastly, here's some Color Watt Highlighting Mascara which I did not swatch on my hand, because I don't want to know how many tiny, tiny little hairs grow on the back of my hand, OK?
So what's a girl to do when she has five different eyeliners to test in one go? SWIRLY LINER! Ha ha. I'm like a green Goth. Actually, this was kind of fun and I could see doing it for an over-the-top faerie or mermaid look. The brushes that come with them are a little soft, so you'd probably want to use your own prefered liner brush for drawing the swirly lines a bit more precisely. I also went back to that gel liner and used it to do more water line.
As for the mascara, I put it on over black. It doesn't show well in the pictures but it is an obvious green accent in real life. Probably more ideal for situations where you'll be right up in the audience's face instead of a stage production, which pretty much seems to be the case with colored mascaras. Stick with colored false lashes if you want to be seen from a distance!
LOOOOOOOOK at the SWIIIIIIRLS! Also notice that the green eyeshadow is weak-sauce. I noticed myself losing color already when I started applying the liner. What the heck? I hadn't even started dancing yet. And in fact, I had sprayed my face with setting spray in hopes of gluing that stuff in place. I am pretty disappointed because it's a nice, shimmery, sparkly shade of green that isn't really represented in my collection yet, but I am obviously going to have to work hard with this and with the emerald in the Bionic block if I want to actually make use of them.
Anyway, I did a bit of dance practice in my house and built up a bit of a sweat, and I found that my liquid liners had transferred a bit to my crease, which seems to happen to me a lot. I should probably set them with powder in the future. The other liners all stayed in place and the shadow didn't fade too much more. Also when I tried to remove the swatches from my hand with a little lid wash on a cotton square, they lingered! I removed the top layer but there are still five distinctly green lines on my hand and some green smudging, even though I've also since washed my hands. So I think they'll hold up to a little sweat. They might even hold up if the fire sprinklers come on in the middle of your palm flame performance.
Over-all impressions? The liners are probably all good buys. The shadows are NOT. As a wise friend said, with emerald being the color of the year, most lines will be releasing their own versions if they don't have them already, so go buy from a brand that is more reliable. The polishes and mascara also seem like fine investments. I only used the glitter sparingly, but I didn't get any fall-out even from all the dancing I did on Wednesday night, so it's probably a good choice, too. I'll likely revisit it in the future.
What do you think? Will you be rocking any of these new products for St. Patrick's Day and May birthday parties? Or do you think that the Pantone collections are just an excuse to sucker us into buying shoddy eyeshadow and more eyeliner than we really need?
First let's look at some of the items from the big Color of the Year box set. You can buy all of these individually, but if you want most of the items it's probably worth buying the whole box.
Here's the color grid block in Bionic. I love how it's packaged! Those are little magnets in each corner, so you can have it all stacked up, or flip the lid and mirror out. Clever! There are two other color grids available and this was actually the least-interesting one to me, but it came in the box and I wanted everything else in the box, so there you have it.
And this is Color Code Prismatic Shadow Block, with a bonus mirror picture of me and my sparkly phone. I actually didn't use this on my first day of testing for reasons that will become obvious when we get down to the swatch.
Here's the Graphic Sculpt Waterproof Jumbo Liner, a big fat liner pencil. This is one of the few items I wasn't going to buy separately, because I wasn't sure what I'd do with it.
Lightspeed Glitter Dust. Aw yeah! This is one of the things I was most excited about. Green. Glitter. Microglitter! Shown here with Medusa's Makeup glitter base, which I will totally review another day because it is also awesome.
Color Cube Lid Stain. I don't know what "lid stain" means but as far as I can tell it's a gel liner, and I love gel liner and I love this color. I guess you can also use it as a shadow, so this will require future experimentation.
Hand swatch, hand swatch! I swear I rotated this picture, but Blogger rotated it back, so whatever. We'll go top to bottom instead of left to right.
As you can see, the silver color in the Bionic block is almost invisible on my hand (but it's actually pretty nice in real life, a shimmery white/silver that really brightened the corners of my eyes), the blue is really "meh" and the emerald green is a spot-on match for the Pantone color.
Then there's the Prismatic shadow block. Ok, this is NOT emerald. It's a nice color, and I like it, but it has way too much of a yellow tone compared to the very blue emeralds in this collection. I had to save it for Day 2.
Graphic Sculpt liner looks pretty good! It's like coloring with a crayon. I decided it would probably be good for under-eye, so that's how I ended up using it, as you'll see soon.
Lid Stain. Oh wow, look at that yummy metallic green. This is one of my new favorite things.
Lightspeed Glitter. Kind of like a mineral eye shadow. Will require future experimentation. Lots of experimentation.
And here's the look I made with those items (minus that not-emerald eye shadow). Looks pretty good with my eyes open! I threw on a little black mascara to complete the look.
Eyes closed, you can really see how weak that blue is. Yuck! This was applied over my usual Urban Decay primer, which was just not enough to make that color stick. But also look at that lid stain liner. So pretty!
And how did it hold up? Well, I wore it for about 6 hours, which included going to dinner and then two hours of dance class. By the time I got home, my emerald and blue eyeshadows had become one and I had naked patches on my eyes. Not pleased. Not pleased at all. I have received a lot of advice on Facebook on how to possibly get the colors to be more intense and last longer, but you know what? That Bionic block retails for $26. At that price, I expect it to be comparable with my Urban Decay and MAC shadows, not some department store cheapy.
Hey! Let's take a break and talk nails! I bought the three pack of Mini Graphic Effect Lacquers. There's a shimmer, which is pretty nice and simple and looks great. There's a glitter, which is more of a shamrock than emerald green and has a slight green tint to the base. I want to try it over other colors for sure. And then there's what they labeled as a metallic, which is more like a semi-matte opaque with lots of glitter. I like how that one looks but it feels kind of chunky. I applied them over a base coat, but since I was in a hurry I didn't use a top coat and I used the quick-dry drops. My left hand (with all three colors) is holding up fine, but my right hand (with just the "metallic") is already chipping a lot.
Please take a moment to admire the awkwardness of this picture where I tried to show all three bottles and all three colors on my nails.
Heyo! Back to the big box! Here is the Graphic Lift Liquid Eyeliner. It is a pretty metallic emerald green but you won't be able to tell until you get down to the swatches because this is a bad picture.
Oh, you like eyeliners, you say? Well how about we also take a look at the Glitter Strobe Eyeliner Set, which contains four different mini-tubes of emerald liquid liner with different effects, similar to the nail polish. I am super-excited about this!
By the way, this release is heavy on the eyeliner. Look, I bought 7 liners and there's still one more I didn't get. And that's not counting the liner pencils that were already available in emeraldish colors. So basically what I am saying is that if you want emerald green eyeliner, they have you covered and then some.
Hey look, swatches! Yep, all those liners are different. There's a nice plain opaque and a few different metallics and glitters, for whatever sort of look you want to do. I also swatched that eyeshadow again so you can see how it doesn't really go with any of these but I'm using it for this look anyway.
Lastly, here's some Color Watt Highlighting Mascara which I did not swatch on my hand, because I don't want to know how many tiny, tiny little hairs grow on the back of my hand, OK?
So what's a girl to do when she has five different eyeliners to test in one go? SWIRLY LINER! Ha ha. I'm like a green Goth. Actually, this was kind of fun and I could see doing it for an over-the-top faerie or mermaid look. The brushes that come with them are a little soft, so you'd probably want to use your own prefered liner brush for drawing the swirly lines a bit more precisely. I also went back to that gel liner and used it to do more water line.
As for the mascara, I put it on over black. It doesn't show well in the pictures but it is an obvious green accent in real life. Probably more ideal for situations where you'll be right up in the audience's face instead of a stage production, which pretty much seems to be the case with colored mascaras. Stick with colored false lashes if you want to be seen from a distance!
LOOOOOOOOK at the SWIIIIIIRLS! Also notice that the green eyeshadow is weak-sauce. I noticed myself losing color already when I started applying the liner. What the heck? I hadn't even started dancing yet. And in fact, I had sprayed my face with setting spray in hopes of gluing that stuff in place. I am pretty disappointed because it's a nice, shimmery, sparkly shade of green that isn't really represented in my collection yet, but I am obviously going to have to work hard with this and with the emerald in the Bionic block if I want to actually make use of them.
Anyway, I did a bit of dance practice in my house and built up a bit of a sweat, and I found that my liquid liners had transferred a bit to my crease, which seems to happen to me a lot. I should probably set them with powder in the future. The other liners all stayed in place and the shadow didn't fade too much more. Also when I tried to remove the swatches from my hand with a little lid wash on a cotton square, they lingered! I removed the top layer but there are still five distinctly green lines on my hand and some green smudging, even though I've also since washed my hands. So I think they'll hold up to a little sweat. They might even hold up if the fire sprinklers come on in the middle of your palm flame performance.
Over-all impressions? The liners are probably all good buys. The shadows are NOT. As a wise friend said, with emerald being the color of the year, most lines will be releasing their own versions if they don't have them already, so go buy from a brand that is more reliable. The polishes and mascara also seem like fine investments. I only used the glitter sparingly, but I didn't get any fall-out even from all the dancing I did on Wednesday night, so it's probably a good choice, too. I'll likely revisit it in the future.
What do you think? Will you be rocking any of these new products for St. Patrick's Day and May birthday parties? Or do you think that the Pantone collections are just an excuse to sucker us into buying shoddy eyeshadow and more eyeliner than we really need?
Thursday, February 28, 2013
Nail Product Reviews, Part 2
As promised, this week's post is about drying your nails in a hurry! I can't be the only one who saves doing my nails for the very last minute before a gig. After all, I don't want to risk chipping them while getting ready, but then they're still wet when I leave the house and I smudge them in the car! So let's look at one actual project marketed for drying nails and two tips from Pinterest. There's ice water, canola oil spray, and Drying Drops from Nicole by OPI. All were applied over Zuza nail polish by Zoya (one of my favorite brands!).
First, I plunged two of my fingertips into a cup of icy water for two-ish minutes. This is supposed to make the nail polish dry hard and fast and also make it easy to remove the excess bits on the finger. Guess what it actually did? It HURT, that's what! Look at how red my poor finger is. And did it work? No. As you can see, my nail smudged badly while I was drying it off. And hours later, after showering, most of that excess polish is still there. If this was the MythBusters, this would get a big fat "BUSTED" stamp over it.
Next I sprayed all the nails on one hand with canola oil. The instructions on Pinterest said to wait until they were dry and then wipe the excess off. How am I supposed to tell if my nail polish is dry if there's oil all over it? So I waited a few minutes while my other hand was in the ice water and dried them off at the same time. Look. It also smudged. And my fingers were oily. Also it seems to have given the polish a weird texture on a couple of nails. So no, this one doesn't work either.
Lastly, the product that was actually designed for this. The instructions said to apply the drops 60 seconds after the polish, then it should be dry to the touch after 1 minute and completely dry after 5. I used it on the first three nails of the icy hand. It was easy to apply and seems to have done the job. After one minute, they were dry. After about five minutes, I was able to scratch/dent the polish forcefully with another nail, but it didn't smudge from normal wear.
Over all, as a dancer I feel like if I'm in a hurry, it's probably going to be best to stick with a quick-dry polish or a quick buffing for my bare nails. However, if the color that you HAVE to have to match your costume isn't quick-dry, you should be safe with the drops. It seems like many of the nail polish brands on the market have their own version, so you may want to shop around and see which has the best value, but I imagine they probably all have the same active ingredient and work the same.
As for the polish? Definitely a fan. I tend to be drawn to the unusual colors that Zoya produces (I have a couple gorgeous muddy olive green hues from them), and this one doesn't disappoint. It's a nice teal green shimmer with a smooth finish. Would be great with a mermaid-themed costume!
By the way, if there's a makeup tip or product that you've seen floating around the internets and haven't felt like trying it yourself, let me know in the comments! I'll look into it for a future column... as long as it doesn't involve putting any part of my body in ice water! Brrr!
First, I plunged two of my fingertips into a cup of icy water for two-ish minutes. This is supposed to make the nail polish dry hard and fast and also make it easy to remove the excess bits on the finger. Guess what it actually did? It HURT, that's what! Look at how red my poor finger is. And did it work? No. As you can see, my nail smudged badly while I was drying it off. And hours later, after showering, most of that excess polish is still there. If this was the MythBusters, this would get a big fat "BUSTED" stamp over it.
Next I sprayed all the nails on one hand with canola oil. The instructions on Pinterest said to wait until they were dry and then wipe the excess off. How am I supposed to tell if my nail polish is dry if there's oil all over it? So I waited a few minutes while my other hand was in the ice water and dried them off at the same time. Look. It also smudged. And my fingers were oily. Also it seems to have given the polish a weird texture on a couple of nails. So no, this one doesn't work either.
Lastly, the product that was actually designed for this. The instructions said to apply the drops 60 seconds after the polish, then it should be dry to the touch after 1 minute and completely dry after 5. I used it on the first three nails of the icy hand. It was easy to apply and seems to have done the job. After one minute, they were dry. After about five minutes, I was able to scratch/dent the polish forcefully with another nail, but it didn't smudge from normal wear.
Over all, as a dancer I feel like if I'm in a hurry, it's probably going to be best to stick with a quick-dry polish or a quick buffing for my bare nails. However, if the color that you HAVE to have to match your costume isn't quick-dry, you should be safe with the drops. It seems like many of the nail polish brands on the market have their own version, so you may want to shop around and see which has the best value, but I imagine they probably all have the same active ingredient and work the same.
As for the polish? Definitely a fan. I tend to be drawn to the unusual colors that Zoya produces (I have a couple gorgeous muddy olive green hues from them), and this one doesn't disappoint. It's a nice teal green shimmer with a smooth finish. Would be great with a mermaid-themed costume!
By the way, if there's a makeup tip or product that you've seen floating around the internets and haven't felt like trying it yourself, let me know in the comments! I'll look into it for a future column... as long as it doesn't involve putting any part of my body in ice water! Brrr!
Friday, February 22, 2013
Nail product reviews, part 1
In a perfect world, all dancers would have the time and money to maintain perfect professional mani-pedis at all times. In reality, we usually hide our chipped toe nails in some sort of dance shoe and quickly slap some polish on our nails right before a gig and hope it doesn't smudge in the car. So let's look at a few nail products. This will be a recurring series because I really love nail polish.
First, a buffing block! I bought mine at The Body Shop but you can get them at other places, too. It has four different surfaces that you can use for sprucing up your nails. It only takes a few minutes and when done correctly your nails will be smooth and shiny. You can even skip polish and just have a clean, natural look if it's appropriate for your costume.
Next, Burt's Bees Lemon Butter Cuticle Cream. I like this product because it is waxy and comes in a tin and feels easier to use and transport than a bottle of cuticle oil. I keep it at my desk and occasionally rub it into my cuticles while chatting on-line or waiting for something to load. It has a pleasant lemony scent. I wouldn't put it on right before doing your nails, though, as it might interfere with the polish sticking to your nails.
Lastly, new nail polish! This is Plume from the Sally Hansen "lustre shine" line. The display had a picture of a peacock feather, so you know it's for belly dancers. This is a yummy coppery gold and in the bottle it shows flashes of green and blue, just like a peacock feather.
When worn, it's very smooth and shiny and metallic, but doesn't seem to quite have the color-shifting properties that the bottle led me to expect. In some lights, at some angles, the color changes, but I want it to shift in front of my eyes whenever I move my hands, because I am easily distracted by shiny objects. I find this a little disappointing because it's pretty expensive for a Sally Hansen product (I think I paid $8 at Target). It is a nice flashy color so I will probably wear it again, but it's not what it appeared to be and I probably won't go buy the other colors from this line, even though there's one called Scarab, in a clear attempt to market directly at me (ha ha). This application was two coats without a base or topcoat. I may experiment to see if adding those does anything to improve the iridescence.
Edited to add: I'm getting more iridescence in rooms other than my office, so it appears to be affected by the quality of light.
The dancer's perspective? I think this would be a great one for cab dancers, it's so shiny! Fusion performers who prefer a flashy look will like it, too. It is not a quick-dry polish, however, so either use it when you have time to wait for it to dry, or check in next week when I'll try several methods of quick-drying nail polish.
One more thing: This is my 500th post on this blog! FIVE HUNDRED! Thank you all for reading, I hope you'll stick around for the next 500, and maybe tell your friends!
First, a buffing block! I bought mine at The Body Shop but you can get them at other places, too. It has four different surfaces that you can use for sprucing up your nails. It only takes a few minutes and when done correctly your nails will be smooth and shiny. You can even skip polish and just have a clean, natural look if it's appropriate for your costume.
Next, Burt's Bees Lemon Butter Cuticle Cream. I like this product because it is waxy and comes in a tin and feels easier to use and transport than a bottle of cuticle oil. I keep it at my desk and occasionally rub it into my cuticles while chatting on-line or waiting for something to load. It has a pleasant lemony scent. I wouldn't put it on right before doing your nails, though, as it might interfere with the polish sticking to your nails.
Lastly, new nail polish! This is Plume from the Sally Hansen "lustre shine" line. The display had a picture of a peacock feather, so you know it's for belly dancers. This is a yummy coppery gold and in the bottle it shows flashes of green and blue, just like a peacock feather.
When worn, it's very smooth and shiny and metallic, but doesn't seem to quite have the color-shifting properties that the bottle led me to expect. In some lights, at some angles, the color changes, but I want it to shift in front of my eyes whenever I move my hands, because I am easily distracted by shiny objects. I find this a little disappointing because it's pretty expensive for a Sally Hansen product (I think I paid $8 at Target). It is a nice flashy color so I will probably wear it again, but it's not what it appeared to be and I probably won't go buy the other colors from this line, even though there's one called Scarab, in a clear attempt to market directly at me (ha ha). This application was two coats without a base or topcoat. I may experiment to see if adding those does anything to improve the iridescence.
Edited to add: I'm getting more iridescence in rooms other than my office, so it appears to be affected by the quality of light.
The dancer's perspective? I think this would be a great one for cab dancers, it's so shiny! Fusion performers who prefer a flashy look will like it, too. It is not a quick-dry polish, however, so either use it when you have time to wait for it to dry, or check in next week when I'll try several methods of quick-drying nail polish.
One more thing: This is my 500th post on this blog! FIVE HUNDRED! Thank you all for reading, I hope you'll stick around for the next 500, and maybe tell your friends!
Subscribe to:
Posts (Atom)